Ultimate Guide to Getting Started with Bikepacking
JUMP TO: BIKEPACKING vs BIKE TOURING / BIKEPACKING BIKES / BIKEPACKING GEAR / HOW TO PACK / HOW TO PLAN / TOP TIPS
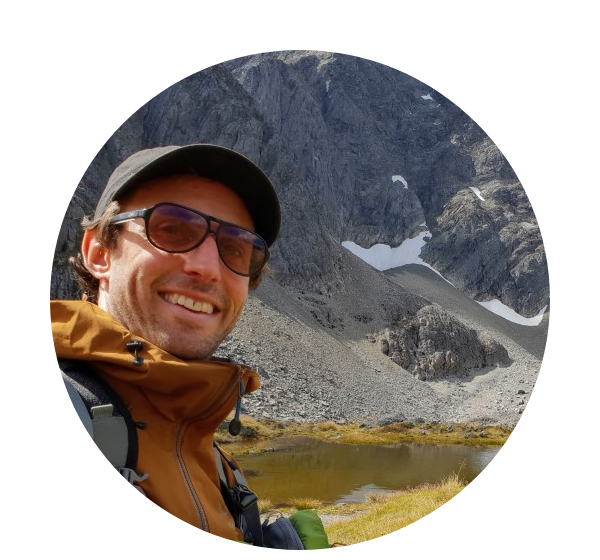
Author: Tristan Ridley
Bikepacking has existed in one form or another for decades, but it’s only in recent years that it has really started to explode in popularity. But what exactly is bikepacking, and how would one go about getting started?
When the term ‘bikepacking’ first burst onto the cycling scene, its definition was simpler. Bikepacking generally meant strapping some camping gear onto your mountain bike and heading out into the wild.
Bikepacking was off-road, with a focus on singletrack. Carrying a tent or bivvy bag meant you could go further, staying out for days at a time. It was mountain biking, crossed with camping.
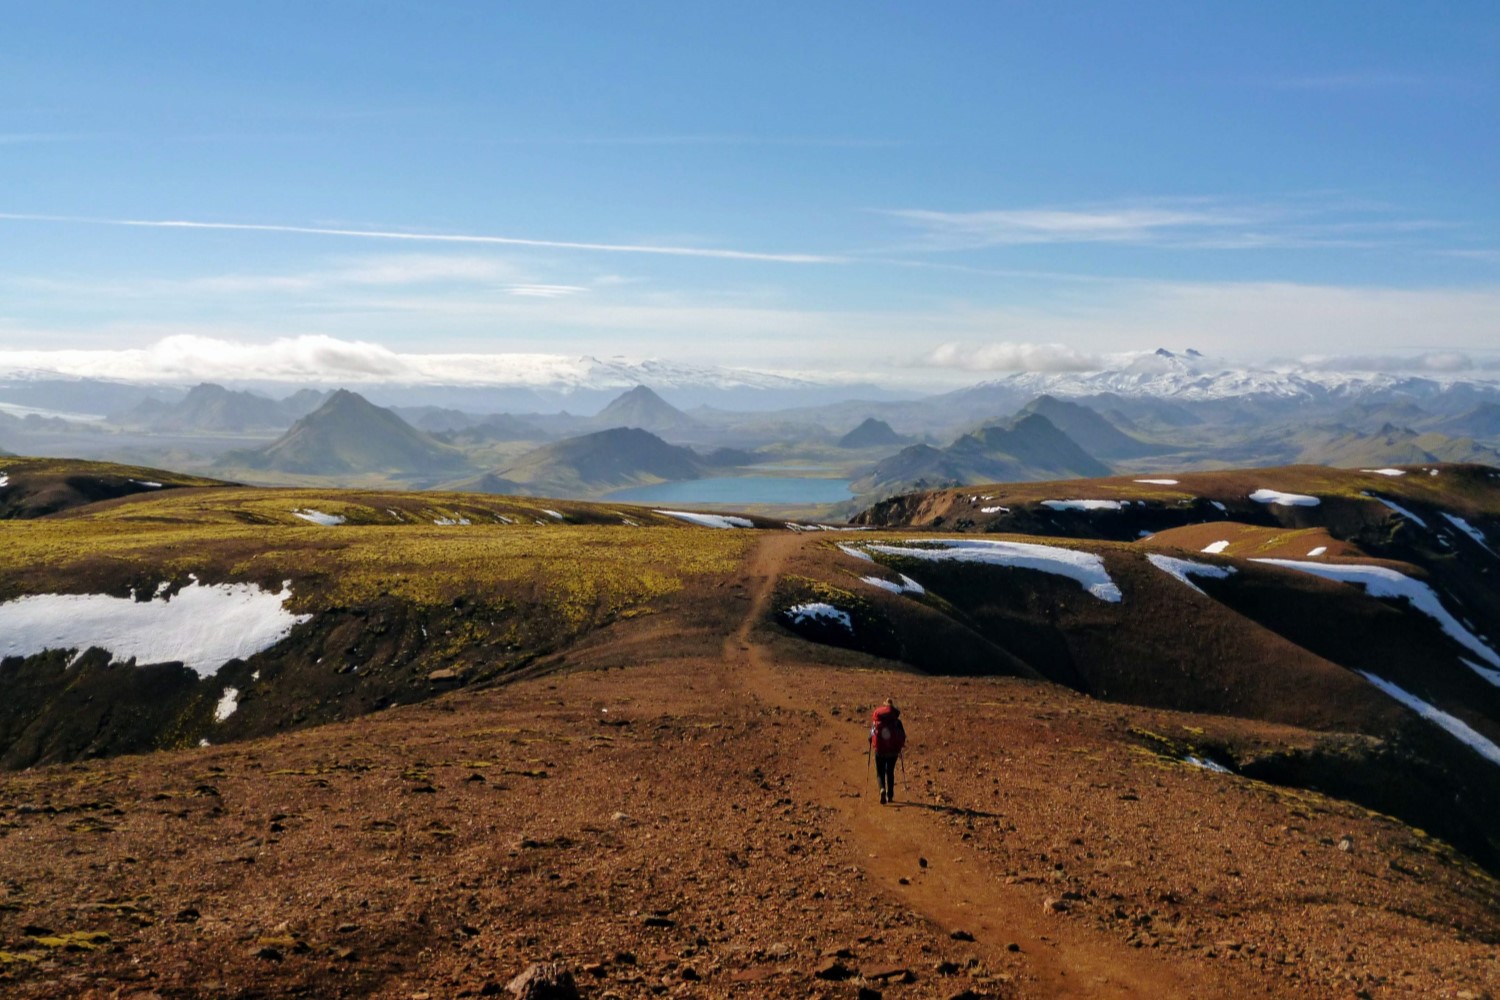
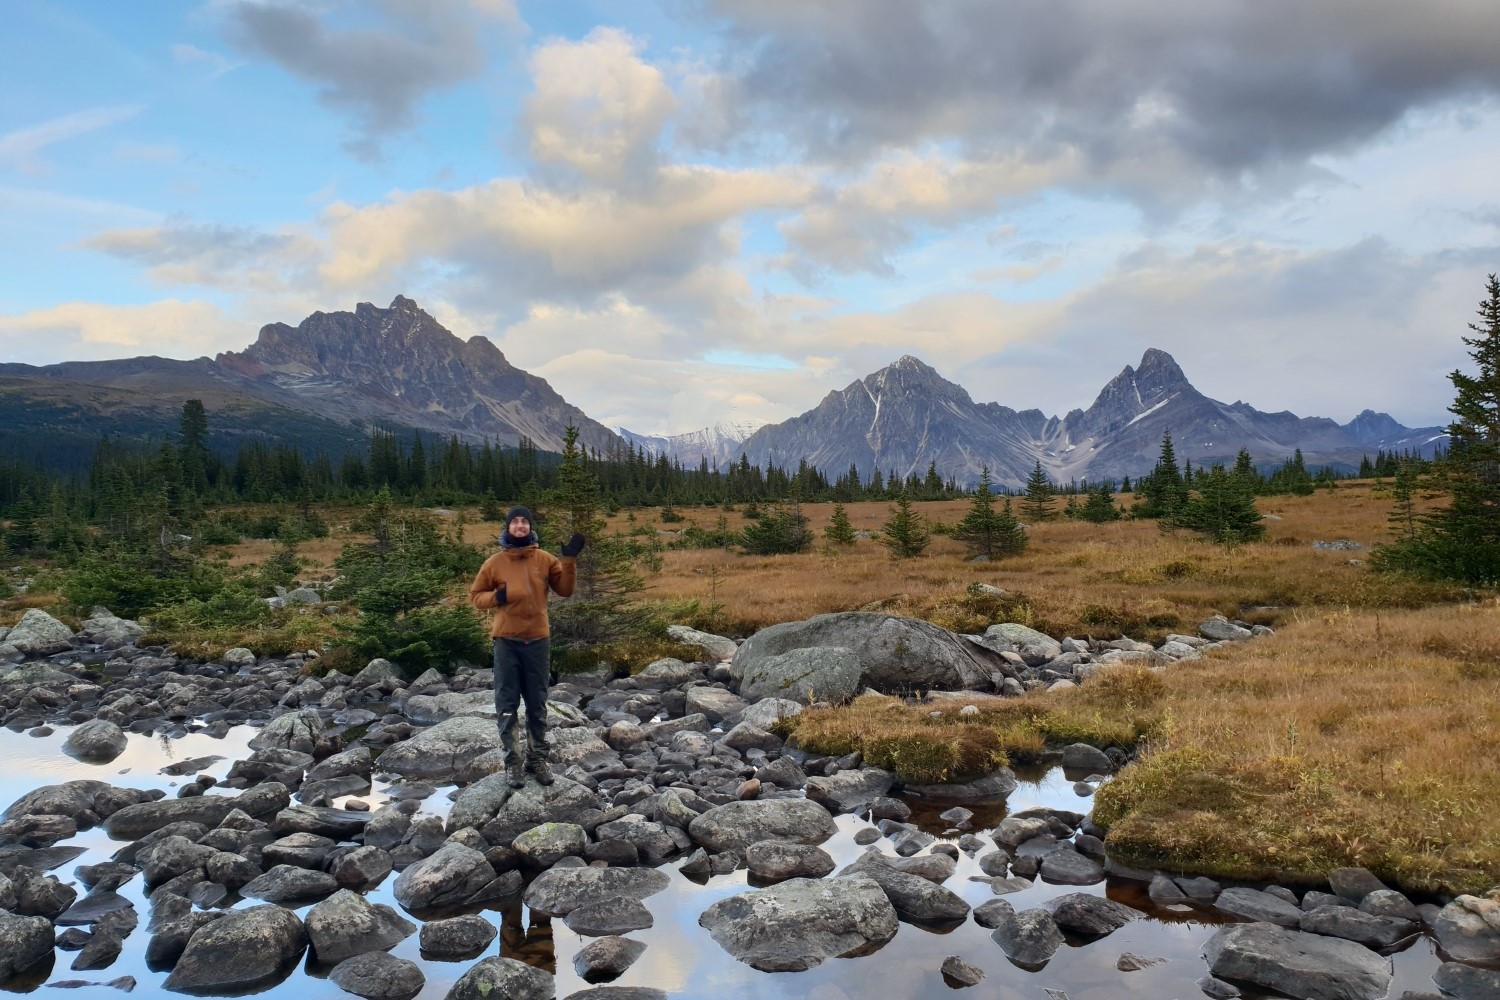
Bikepacking — at its core it is just strapping a self-sufficient setup onto your bike and heading into the wild. Photo Credit: Tristan Ridley.
As it has become more popular, its definition has blurred somewhat, but fundamentally this marriage of (predominantly off-road) cycling, and camping, remains at the core of bikepacking.
Bikepacking is all about getting out and exploring on your bicycle, being self-sufficient, and spending time in nature.
It’s versatile - you can bikepack both on and off-road. You can do it on singletrack trails, and you can do it on gravel. You could go bikepacking for a quick two-day overnighter, head out for a week-long cycling holiday, or leave home and strike out on a full continent-crossing expedition.
It can be whatever you want it to be — bikepacking is all about going on adventures.
Love the imagery in this article? Check out more @tristanrid.
BIKEPACKING VS BICYCLE TOURING
Whereas bikepacking is a relatively new concept, bicycle touring has existed for much longer – Thomas Stevens was already doing it when he set off to become the first person to cycle around the world on his penny-farthing in 1884.
Thomas Stevens on his round the world trip in the 1880’s — bikepacker or bicycle tourist? Photo Source: Wikimedia Commons.
So, what’s the difference between bikepacking and bicycle touring?
In fact, there isn’t a completely clear-cut answer! But we can talk in generalizations.
Bicycle tourists usually use heavy-duty touring bikes, carry equipment in panniers, and tend to bring a lot more stuff. They usually gravitate towards paved roads, and are far more likely to be going much further for much longer.
When you think of people cycling around the world, or crossing continents, you’re probably talking about bicycle touring.
Bikepackers, on the other hand, pack much lighter, often avoiding racks and panniers altogether in favor of soft bikepacking bags, and tend towards off-road routes.
Because it usually provides less packing space, bikepacking lends itself more to shorter trips. It is therefore great for people who work during the week but want to get out on the weekends, or who want to take a week off for a cycling holiday.
Bikepackers tend to head off road, travel light, and use soft bikepacking bags; whereas bicycle touring is usually on paved roads with traditional rack & pannier setups.
Traveling light allows you to get a lot further off the beaten track, and to comfortably push much deeper into the wilderness.
In truth though, the lines between bikepacking and bike touring are increasingly blurred, and the two terms are increasingly interchangeable; we’d suggest not worrying too much about definitions.
For most people looking to do relatively short trips of a few days or even a few weeks, and for anyone intending to spend most of their time off-road, a bikepacking-style setup is usually the way to go. And even for those looking to travel for longer, or those who prefer to stick to paved roads, it’s still well worth incorporating certain aspects of bikepacking.
WHICH BIKE SHOULD YOU USE FOR BIKEPACKING?
Part of the appeal of bikepacking is that you don’t need an expensive or specialist bicycle to get started. Bikepacking bags are designed to be suitable for a wide range of bikes; you don’t even need one that has rack mounting points and so virtually any bike can be used for bikepacking.
If you already own a bike that you find relatively comfortable, we’d suggest starting with that.
If you’re looking to buy a new bike with bikepacking in mind, it’s a good idea to start by thinking about the type of riding you want to be doing.
If you’re mostly interested in riding singletrack routes, then a hardtail mountain bike could be a great choice. If you’re mainly looking for a mix of dirt roads, bike paths, and paved roads, a gravel bike might be perfect. And you could even go bikepacking on a road bike if you were set on sticking to smoother surfaces.
All bikes make compromises, and there will never be a ‘best’ bike for all circumstances.
A typical bikepacking setup usually consists of a bike suitable for off-road use, and soft bags instead of traditional racks and panniers. Photo credit: Tristan Ridley.
Terrain and gearing
Whichever style of bicycle you decide to go with, there are a few things it’s worth bearing in mind. Because you’ll be carrying more weight than usual when bikepacking, you’ll want to make sure that you have some nice low gears to help with getting up the hills.
Comfort and setup
You’ll likely be spending quite a lot more time in the saddle than you’re used to, so comfort is paramount. The ideal bikepacking bike isn’t necessarily going to be the fastest or the lightest, but it’s going to let you pedal all day without experiencing discomfort.
Setting up your bike with a more relaxed and upright riding position can be easier on your body, especially if you’re planning on being on the road for several days. Your hands can get sore over long days of riding, so it’s a good idea to soften the pressure with either ergonomic grips if you’re using a flat handlebar, or thick, padded bar tape, if you’re riding with drops. We’d also strongly recommend investing in a comfortable saddle!
WHAT GEAR DO YOU NEED FOR BIKEPACKING?
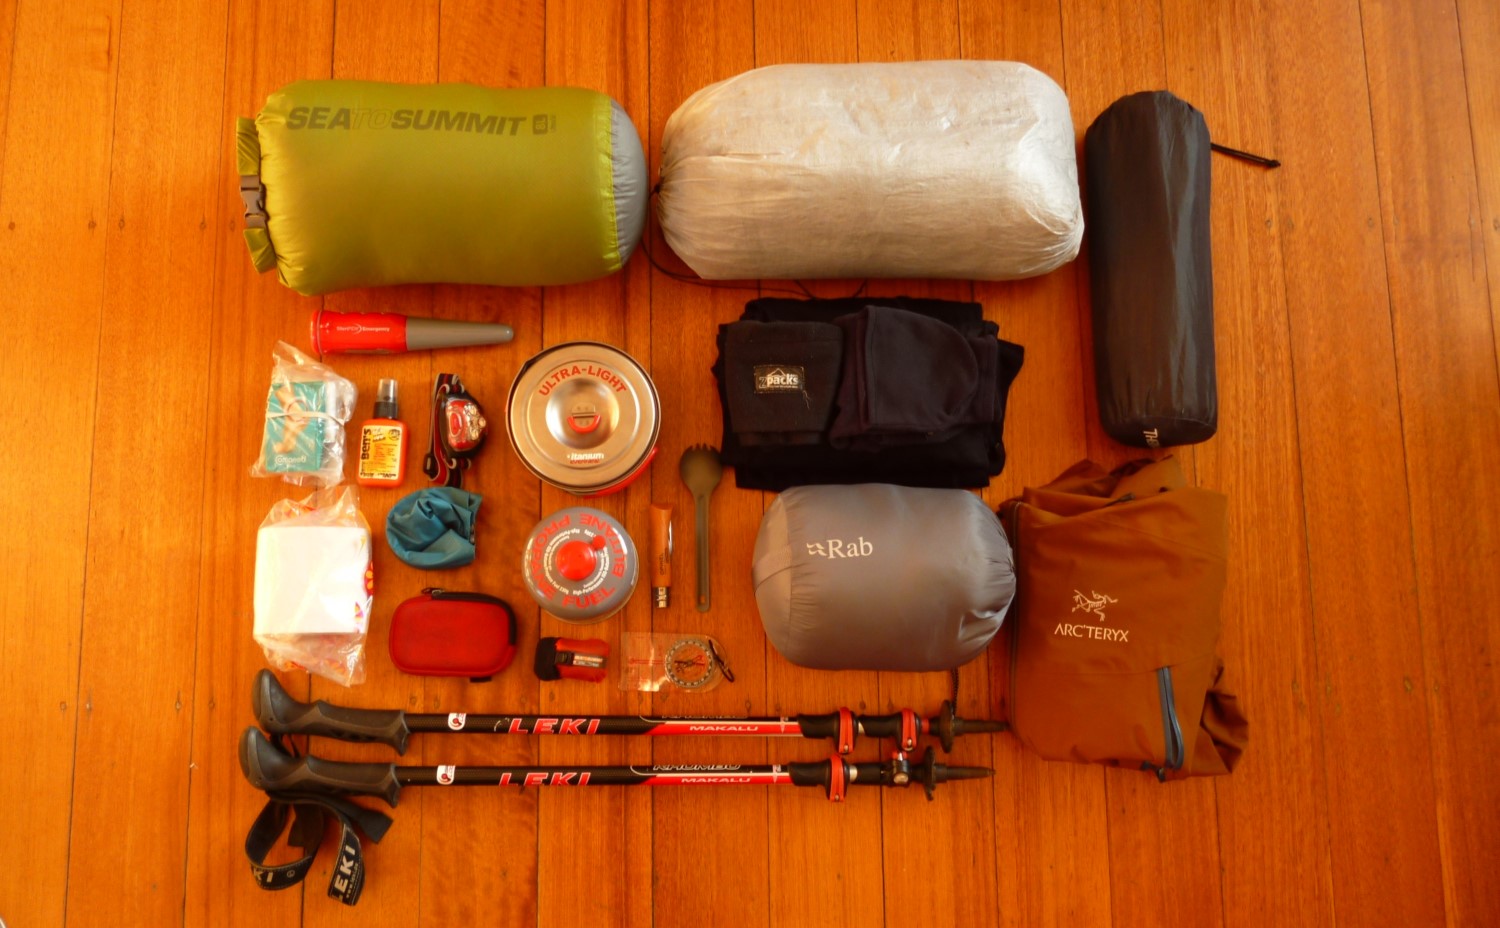
Because bikepacking bags tend to have limited space, you’ll probably have to do away with all but the essentials; we’d encourage you to pack as light as possible!
Camping equipment
There’s a lot of overlap between bikepacking and backpacking, and many of the gear requirements are the same, so if you’ve done any backpacking then you’ll probably already have most of the equipment you need. If you are interested in seeing our top recommendations for backpacking gear, then hop on over to our ultimate backpacking gear list.
Camping equipment is going to be vital for most bikepacking trips, so there is a lot of overlap with backpacking gear.
Some form of shelter system, whether a tent, tarp, or bivvy bag, is essential, as you’ll likely be camping out every night.
Unless you live somewhere very hot, you’ll also want a sleeping bag or quilt, and we’d always suggest bringing along a camping mattress. Some warm clothes such as a down jacket, if it might get cold, and a rain jacket, if it might get wet.
Always make sure you have enough food and water, and that you know where you’ll be able to resupply if necessary.
A camping stove, combined with a small pot, can give you access to hot meals and tea/coffee, but you can also get by on cold food (as if we needed an excuse to eat more biscuits) especially on shorter trips. Don’t forget your toothbrush!
Tools and repair
In terms of bikepacking specific gear, we’d suggest having at least the basic tools you’ll need to fix the most common bike issues.
Flat tires are almost inevitable on any long trip, so you want to carry the equipment neccessary to repair them.
A bike multitool will cover most of your needs; we’d suggest getting one with a chain-breaker tool and tire levers.
A patch kit and spare inner tube will allow you to deal with punctures (if you’re not already going tubeless), and naturally you should always have a bicycle pump with you.
Finally, bring along a small bottle of bicycle chain lube, and use it when necessary to keep your chain running smoothly.
Learning some basic bike maintenance, and how to fix a flat tire, is also highly recommended. It’s very easy to teach yourself how to do this – YouTube is a great resource!
If you’re not familiar with the process already then check out the short video below:
HOW TO PACK FOR BIKEPACKING
There’s nothing stopping you from grabbing your 65-liter hiking backpack, loading it up, and riding off into the sunset. But of course, carrying a lot of weight on your back whilst cycling is very uncomfortable. It will also put more pressure on your sit bones, which can lead to a painfully sore backside.
It’s therefore best to get as much of the weight as possible off your back and onto your bike. It’s fine to wear a small backpack for bikepacking if you need some extra capacity, but we’d suggest keeping the weight down to around 5lbs (2.3kg) or less, especially on longer rides.
Bikepacking bags
Instead of carrying the weight on your back, as a bikepacker you’ll have access to a selection of cleverly designed bikepacking bags, which strap directly onto your bicycle.
Although there are many other smaller accessory bags available, the most important bag types fall under three categories.
A handlebar roll sits under your handlebars and is a great place to store your tent and sleeping bag/mat. A frame bag sits between your legs, inside your bike’s triangle, and is the best place to store heavy items like food, water, tools, and electronics. And finally, a seat pack attaches at the back of the bike, underneath your saddle, and is great for storing extra clothes, food, and overflow.
Bikepacking bags should allow you to carry most of the camping equipment you’ll need. Photo credit: Tristan Ridley.
There are also a variety of other smaller bags that can be used if you need more storage but don’t want to carry a backpack. Dry bags can be attached to the forks through specially designed cargo cages, while top-tube bags and handlebar pouches can be used for small items, snacks, or water bottles.
To begin with, though, we’d suggest starting with the big three - a handlebar roll, frame bag, and seat pack. These will give you the best bang for your buck and sticking just to these three bags will encourage you to pack lighter, always a good thing!
All of these bags are designed to work for most bicycle types, although it’s worth bearing in mind that handlebar bags and seat packs aren’t compatible with the small number of bikes still using older-style cantilever brakes – you’ll need either v-brakes or disc brakes for these.
You don’t need fancy bikepacking bags to get started — strapping on some dry sacks to your bike is good enough!
There’s nothing to say that you absolutely need to have these bags to go bikepacking, however - people were going out bikepacking long before modern bikepacking bags even existed. If your bike can fit a rear rack, it’s perfectly reasonable to stuff your gear into a large dry bag and strap it all to your rack with bungee cords, or even to simply use panniers.
Modern bikepacking bags are going to be lighter, slicker, and more streamlined, and they’ll distribute the weight more evenly across your bike, resulting in better handling. But they are by no means absolutely necessary.
Not having the perfect gear should never stop you from having fun bikepacking. So if you’re reluctant to splash out on purpose-built bags, we’d strongly encourage you to make do with what you have, and just get out there!
HOW TO PLAN YOUR FIRST BIKEPACKING TRIP
You’ve got a bike. You’ve got the bags and gear. You’re ready to get out there. But how?
Planning a first bikepacking trip can seem like a daunting prospect, but it’s actually relatively easy to put together a suitable route.
We’d suggest starting close to where you live – especially in the beginning, it’s comforting to know that if you have any issues you’re never far away from home. And you’ll probably be amazed at how many great places there are, right on your doorstep, to which you’ve never been.
Bikepacking is a great way to explore your backyard!
Key considerations for route selection
There are a few things to consider when choosing a route.
How many days will you be going for?
Where will you be sleeping – do you want to wild camp, or stay in campsites?
Where will you be able to resupply with water?
How much food will you need to carry?
Do you want to be riding on singletrack, gravel, or paved roads?
Once you have the answers to these questions, you’re ready to begin looking at some maps and routes.
Trip duration
We’d suggest that for first-time bikepackers, a two-day, one night, weekend adventure, is the perfect way to start. Ideally, set off from your front door, or if you live in the center of a big city, use public transport to get out into the countryside, and start from there.
Plan a circuit that finishes back where you started. Think about where you’d like to camp, and find a route that lets you cycle out there on the first day, then ride back (preferably via a different route) on the day after.
Start with something simple; as you gain confidence and experience you can start building up to longer and more challenging routes.
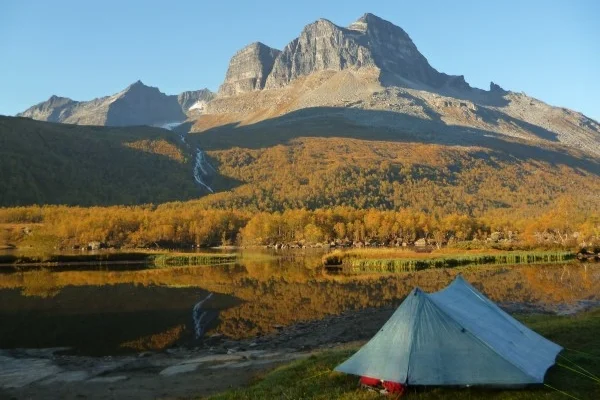
We suggest you start out small and close to home, but eventually bikepacking can take you to some pretty stunning destinations. Photo credit: Tristan Ridley.
Knowing your mileage
The distance you can expect to cover in a day is going to vary greatly depending on your fitness, weather conditions, the terrain, and whether you’re riding on singletrack, gravel, or pavement.
When starting out, always err on the side of caution – if you end up at camp a few hours earlier than expected it’s hardly the end of the world, but you don’t want to get stuck having to ride several hours into the night.
A good solution is to go out for a few day rides on the kinds of routes you’d like to bikepack on; by keeping track of your mileage you should be able to get a reasonably good idea of the kinds of distances you should be aiming for.
Online resources
There are many resources online that can help you with planning a route. Google Maps is a simple but effective tool for both planning and navigating, or if you prefer something more old-school you could also go for regular paper maps.
Believe it or not, paper maps are still a thing (if you want them to be).
If you’re comfortable with something more advanced, there is an assortment of fantastic smartphone applications available.
Bikepacking.com has a fantastic article on route planning. And if you are based in the US and planning a DIY route then check out this awesome advice on bikepacking across public land.
Finally, for a detailed guide on how to use modern GPX technology for planning and navigation, see here.
OUR TOP TIPS FOR BIKEPACKING
Take your time! While it can be tempting to try to cover as much distance as possible, you’ll have much more fun if you slow things down and let yourself fully appreciate the experience. It’s not a race – less is often more, at least when it comes to mileage.
Pack light! Take only what you absolutely need, you’ll thank yourself on the climbs. If you’re not sure whether you really need something, ask yourself what would happen if you didn’t take it. If leaving it behind would dramatically inconvenience or endanger you (for example, forgetting your raincoat on a wet day), bring it. If not, leave it at home.
Balance the bike! This is especially important on technical routes, but this is beneficial no matter what kind of riding you’re doing. Try to keep your heaviest items in your frame bag at the center of the bike, with the rest evenly split between the front and rear.
Play with your tire pressure! Tire pressure can make a huge difference to both comfort and speed – most people know to pump up the pressure when riding on paved roads, but often forget to let some air out when riding off-road. Different surfaces will suit different optimum pressures, so play around with different pressures to suit the conditions.
Don’t sweat the details! It’s easy to get fixated on having the right bike, the best equipment, or the perfect setup, but never let your gear stop you from going on adventures. So long as you have the basics covered; a bike, shelter, sleep system, and some way to carry it; you can go bikepacking. People have cycled around the world on junkyard bikes. You don’t need the perfect setup; you just need to start pedaling.
MORE INFORMATION
If you loved this article, then you'll likely love reading about some of our other bikepacking and backpacking articles:
Whatever you decide, enjoy the adventure and take care out there in the wild!

Keen To Browse More Outdoor Kit?
Check out our Gear Reviews overview page. Or focus in on one of these awesome review sections:
Ready To Start Building Your Dream Kit List?
In our Ultimate Gear Lists section we provide a list of best-in-class items for specific outdoor adventures. Get inspired by checking out our:
Gagging To Get To The Outdoors?
Find a jaw-dropping location for your next wilderness adventure by checking out our epic Destination Guides! How about: